
15 Spring & Summer Home Maintenance Checklist Tips
How To Get Your House Ready For Spring and Summer
What maintenance should I do for my house in spring and Summer?
New homeowners often ask these questions because they know that there are things to be done, they’re just not sure what to do, or when.
Seattle has had a pretty wet winter and spring. Just recently we had heavy rains and some thunderstorms. So while “Spring” may soon be officially over in many parts of the country, a lot of Seattle homeowners are just getting around to their Spring cleaning and seasonal home maintenance. This makes perfect sense because a lot of the items on this checklist need to be performed when the house has had a chance to dry out.
Can I do home maintenance tasks myself?
Yes! Most of these items are something that the average homeowner can totally do themselves! Like a lot of the articles we write, we will include several DIY tips and “How-To Guide” step by step instructions.
Some items on this checklist, such as inspecting the roof, are things that you may wish to hire a professional to do for safety reasons. Of course if you would just prefer not to get dirty crawling around outside, you can always call a pro to get these things taken care of. It’s never a bad idea to make sure that maintenance tasks are done right. Spending a little now, can save you a lot of money later!
Checklist at a glance: (click any item to scroll down to that section)
Ready to get started?
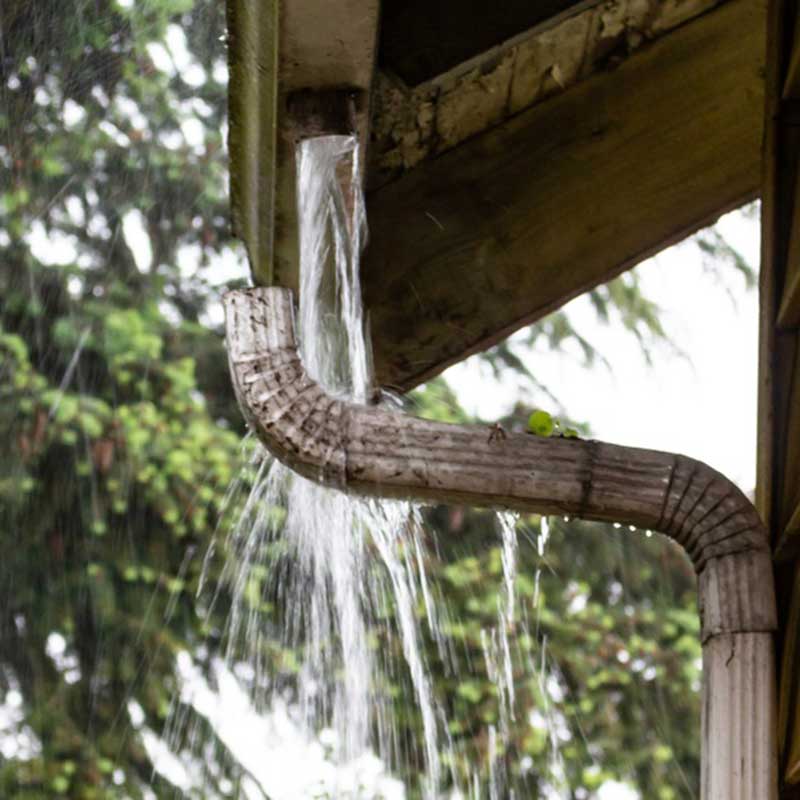
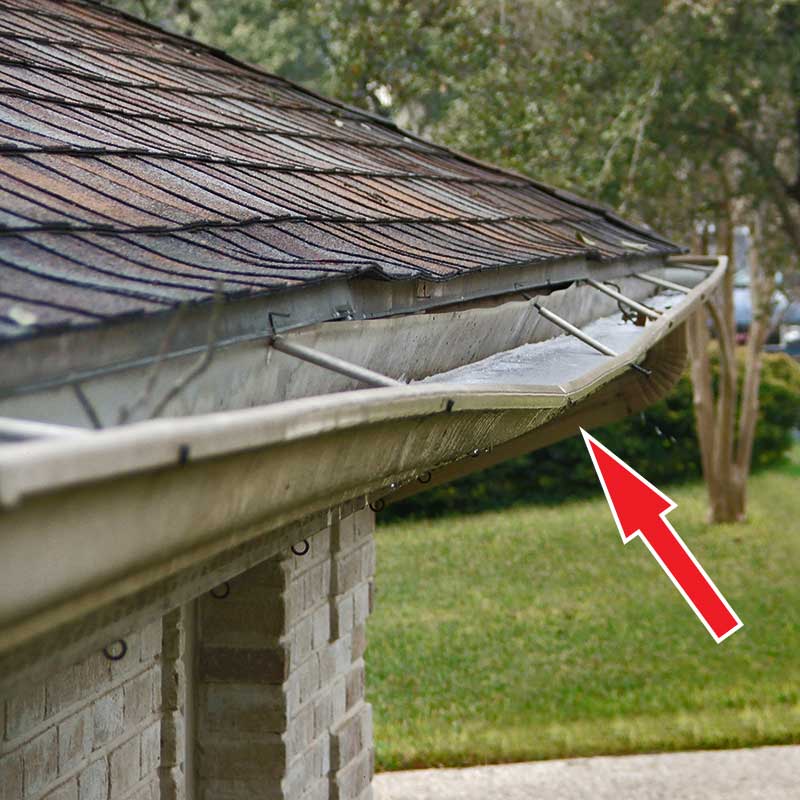
#1 Checking The Downspouts & Gutters
#1 Checking The Downspouts & Gutters
Start by giving the gutters and downspouts a once over to see if you spot any obvious problems. You can do a visual inspection from the ground level just to make sure that no winter storms knocked them loose or disconnected the junctions. Once you confirm that every thing looks right, you will want to check if they are working or obscured with leaves and pine needles. The simple way to check this without leaving the ground may be with your garden hose. Shoot some water just over the area above the downspout and see if it is easily returning it to the ground. Keep the process up for a few minutes to simulate a substantial rain shower.
The better way to do a complete check of the gutters and downspouts is with a ladder. Obviously this comes with more risk the higher off the ground you are. If you have the appropriate ladder and feel confident to do so, it’s recommended to climb up and visually inspect the gutters. While cleaning any debris from the gutters. be careful not to lean over any farther than you can stay balanced. Sometimes a small garden tool attached to a broom handle can safely extend your reach. At the end of the day, it’s better to get down and re-position your ladder than it is to lean to the side and risk a potential fall. Another way to do this on a low angle roof is from above. That said, you definitely want to use a fall protection harness if you choose this method.


Swipe to Scroll -->
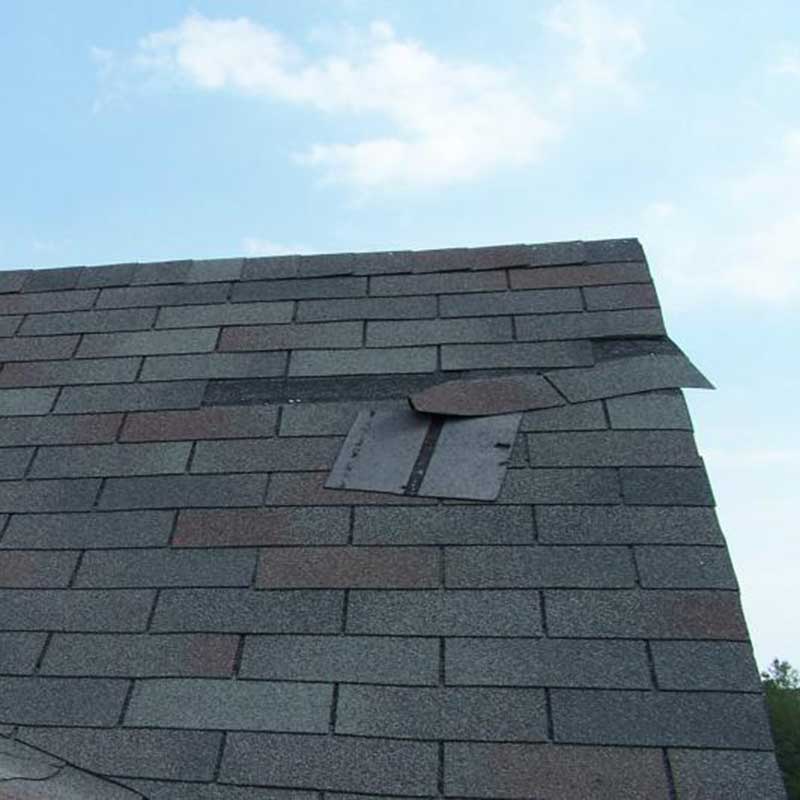
#2 Inspecting the Roof
#2 Inspecting the Roof
While you are cleaning your gutters is the perfect time to inspect your roof for any damage or excessive moss growth. Look for any shingles, roof tiles, and metal flashing that are loose or damaged. If you see any areas where water can get in, it’s advisable to call someone to repair your roof immediately. The most common roof maintenance task required is dealing with roof moss.
In our Pacific Northwest, we see a lot of mossy growth on roofs. This is especially true on the north facing side or anywhere trees block the sun. Besides this not looking good, over time it can reduce the life of your roofing.

There are a few things you can do to prevent and remedy this. One method is to treat the moss with chemicals like “Moss Out”. Others may opt for more natural products like baking soda or a mixture of bleach and water. One way to prevent moss from growing in the future is to have zinc strips installed at the ridge of your roof. Over time the rain will cause some of the zinc to coat your roof and inhibit moss growth.
If you want to take a more immediate approach to moss removal, we suggest using a push broom. Obviously we urge caution anytime you climb on your roof and recommend wearing a fall protection harness. If you feel comfortable walking on your roof, pick a time when it hasn’t rained for at least a few days.
Use the push broom with gentle pressure going parallel to the ridge and slightly downhill. The large chunks of moss should roll off without much effort. Be careful to not push so hard that you damage the shingles. Use a small putty knife or painters tool to scrape off any stubborn bits. Once the job is done, use one of the methods we mentioned to prevent it from growing back. If you already cleaned the gutters, you may need to do it again.


Swipe to Scroll -->
#3 Waterproofing Doors & Windows
#3 Waterproofing Doors & Windows
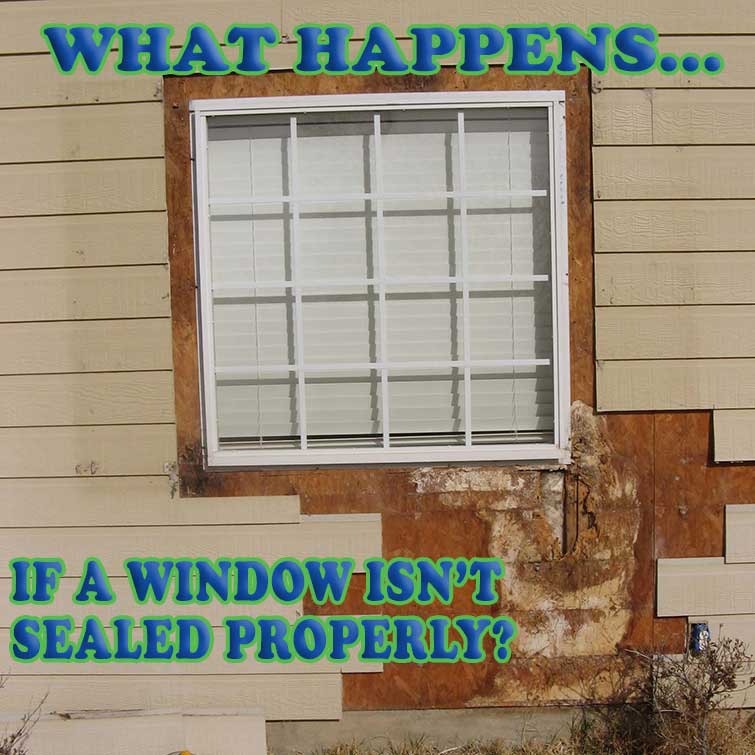
Seattle winters can be hard on your home’s exterior. The constant wet damp conditions, combined with fluctuation in temperature can cause things like caulking around doors and windows to shrink and crack. Wind storms or overgrown shrubs can knock things loose.
Start by going around and inspecting the caulking / waterproofing at each door and window. If you need to, use a ladder to check the tops of the windows. This is important because water problems usually start at the top and trickle down. Caulking should be somewhat flexible to the touch on a warm day. As it ages, cracks may appear revealing gaps that allow water to get in.
If you find these gaps and cracks you need to address it before it gets worse. Once water finds its way in, you will start to see mold and rot damage. Depending on how many widows and doors you have this can be a multi day project for one person. It’s worth noting that if the weatherproofing is failing at one or two of the windows, then the others are probably not be far behind.
How Can I replace old window and door caulk?
To fix it yourself, you will need a putty knife or painters tool (referred to as a 5-in-1), a utility knife, 80 grit sandpaper, a caulk gun, several tubes of paintable exterior caulking, and a few rags.
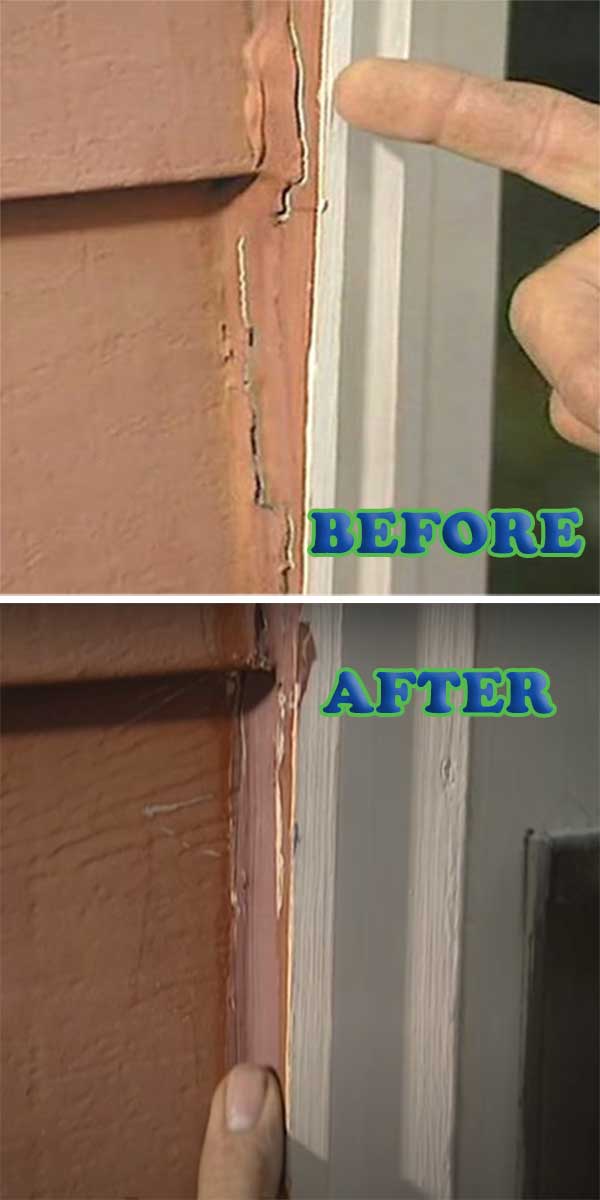
- Start by removing all of the old caulking around the window or door. You may need to neatly cut some of it away with the knife, then use the 5-in-1 to scrape the rest away. BE CAREFUL NOT TO DAMAGE THE TRIM OR SIDING
- Go over the area lightly with the sandpaper to make the area smooth and remove any little pieces. You can also use a dry rag, or scrub brush for this step. The cleaner the surface, the better the new caulk will work.
- Cut the tip of the caulk tube at an angle. Try to start with a fairly small opening at the tip. Too big and it will just make a big mess. You can always cut more away if you have a large gap to fill. (be sure to poke a hole in the tube where it meets the nozzle)
- Gently squeeze the caulk gun as you move your way along the gap. Try to make long steady movements. If you have a large gap to fill, it might be better to first do the two sides and come back to fill the middle 20 minutes later. If going vertically, start at the top and work your way down.
- If you are happy with the coverage, just wipe your finger lightly along the caulk like to smooth out caulking and leave a nice finished look. Stop to clean your finger if excess caulk builds up. Then clean up any excess around the window or door with a damp rag.
- Finally one it has dried completely, you can go over it with either the trim colored paint or match the house exterior color. Depending on where the line sits visually, you may need to touch up both colors.
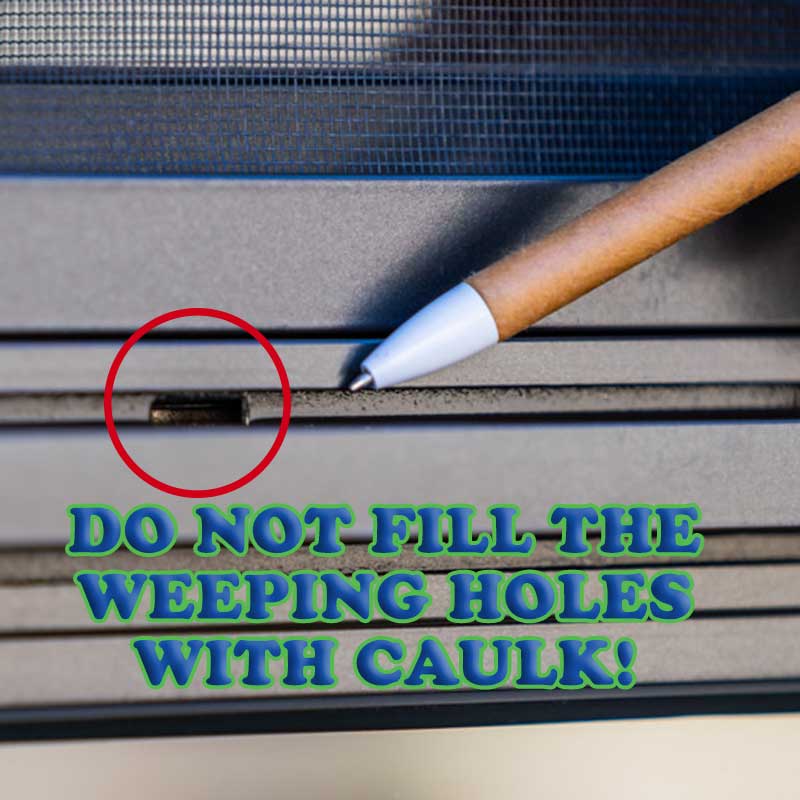
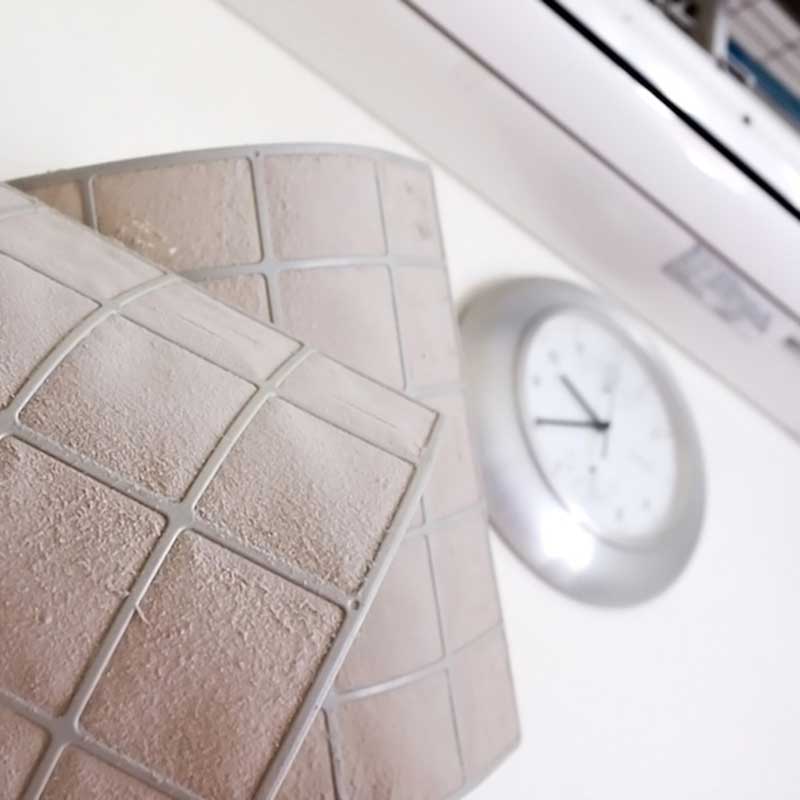
- ONE VERY IMPORTANT NOTE: Some windows have “weeping holes” that allow trapped water to escape. DO NOT FILL THESE WITH CAULK! (See photo below)
This video shows the steps described above
Swipe to Scroll -->
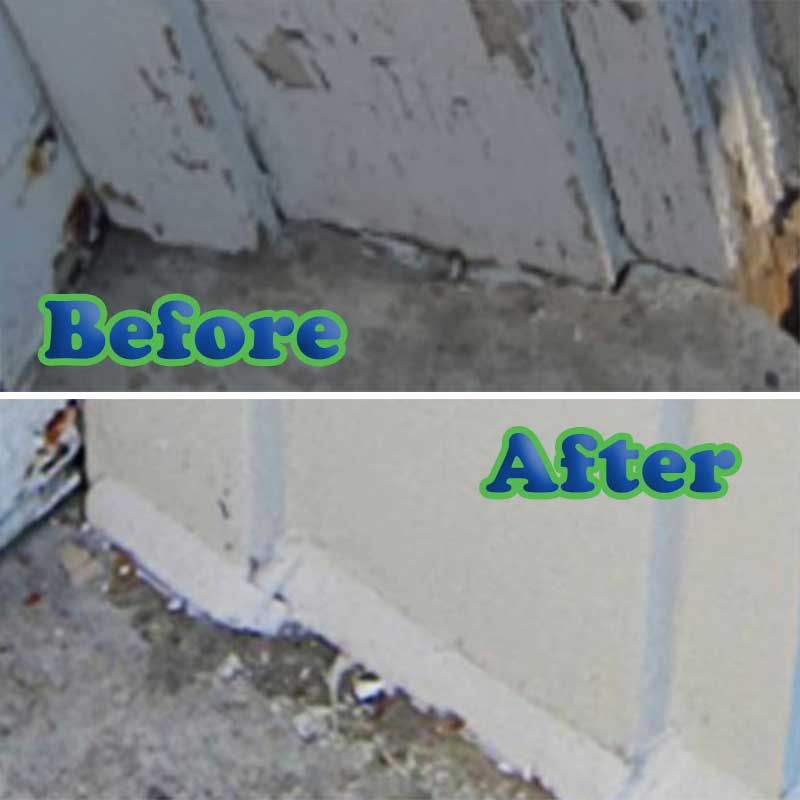
#4 Repair Water Damage
#4 Repair Water Damage
This item isn’t so much of a Spring Maintenance issue, but it goes hand in hand with the previous point. The biggest reason we have included it on this checklist is that leaving it until later will only make matters worse. By addressing moisture issues in the warm dryer months, you can repair and properly seal the areas with less relative humidity.
If you had gaps in the roof or weather proofing and moisture was getting in over the wet Seattle winter, you probably have water damage to address. Hopefully you have addressed the source of the water by the time you get to this step. If not, it does you no good to put a bandaid on an infected wound so to speak.
Although we are primarily focused on the exterior in this article, it’s a good idea to check inside as well. Any areas near or below indoor plumbing can also suffer from water problems. These can be maintained and repaired at any time of year.
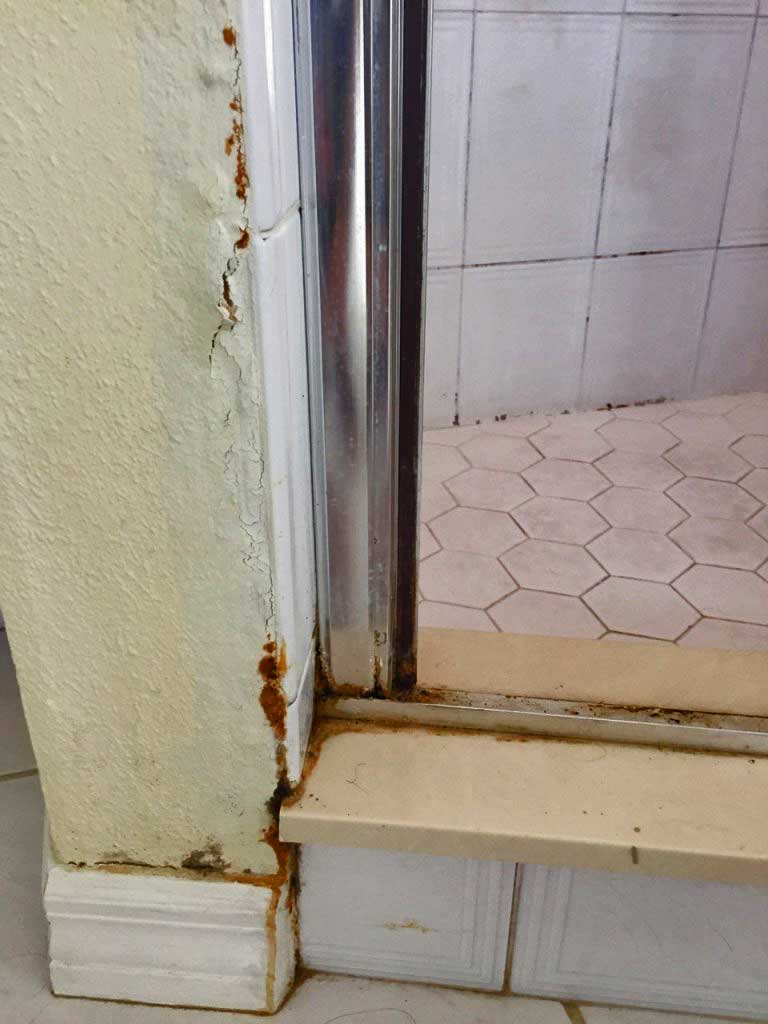
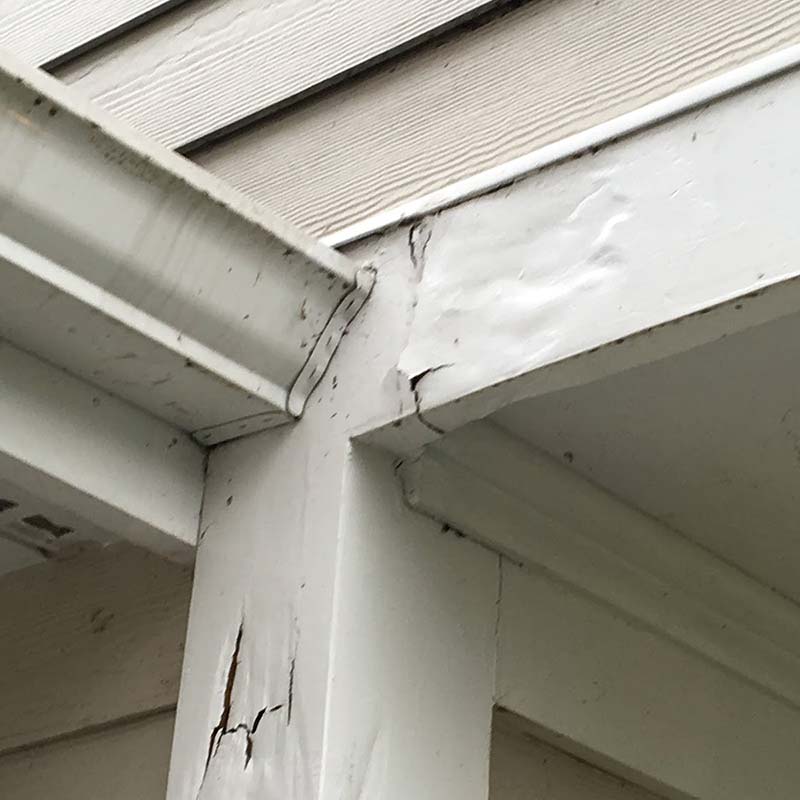
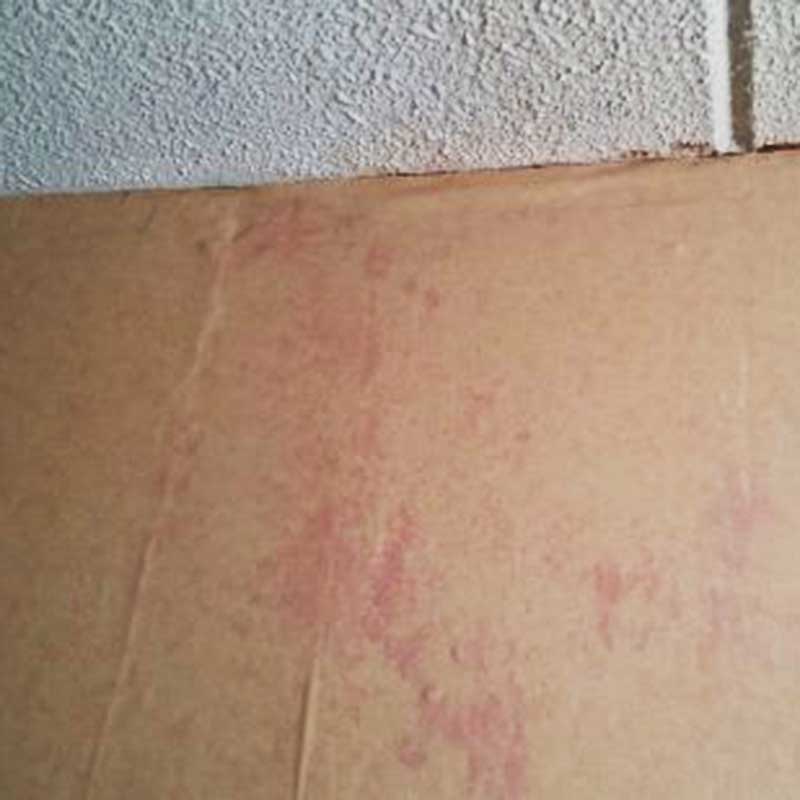
How can I tell if I have water damage?
Here are a few sure signs of potential water damage.
- Smells of mold or mildew.
- Visible stains, black dots (sometimes pink),
- Peeling, bubbling, or cracking paint
- Expanded wood around baseboards or window sills
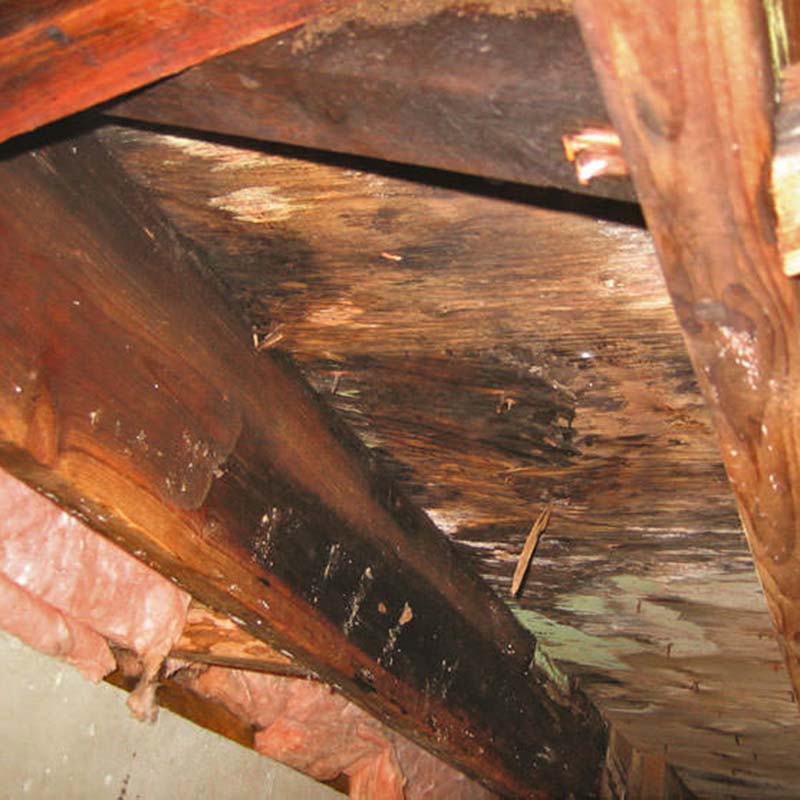
- Wood that is sponge like or falls apart with gentle pressure
- Parts of the wall around the tub or shower move when pushed on
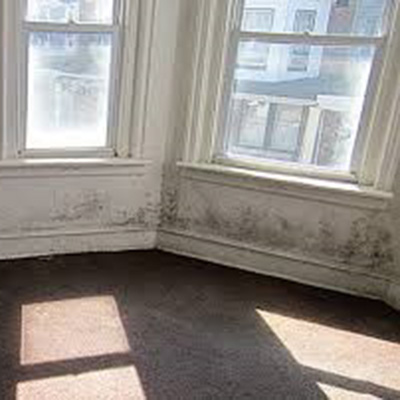
Whatever you are seeing on the surface is likely to be hiding much bigger problems. If you suspect you have water damage, we recommend calling a professional. They can make an assessment to address both the source of the water, and ensure that the problem has been remedied.
A licensed and bonded contractor like Talon Enterprise, will also be able to open the affected areas and inspect for any rot in the structure of your house. Some situations may be simple to repair if addressed early, while others can create dry rot and require significant repairs if left long enough. There is no sure way to know the extent of water damage without an onsite inspection and some investigating. Therefore we can’t give you much more information than that or suggest how you can repair it yourself.
Swipe to Scroll -->
#5 Addressing Mold Inside & Out
#5 Addressing Mold Inside & Out
Winter in the Pacific Northwest is a wet time of year with little to no sunshine. It comes as no surprise that these conditions are the perfect scenario for moss and mold to grow. Spring and Summer therefore, are the perfect time of year to address these issues. Once the spores are killed, the warmer dry air and increased sunlight will help keep them at bay naturally.
Before we discuss this in depth, we are assuming that you have already sealed the exterior of the house and dealt with any water issues. Only by removing the source of water can you prevent the growth of mold. It’s also worth pointing out that serious mold issues can be toxic and should be dealt with by a mold remediation specialist. The remaining mold remediation becomes part of the yearly spring cleaning. However, we will address other possible causes and how to deal with them.
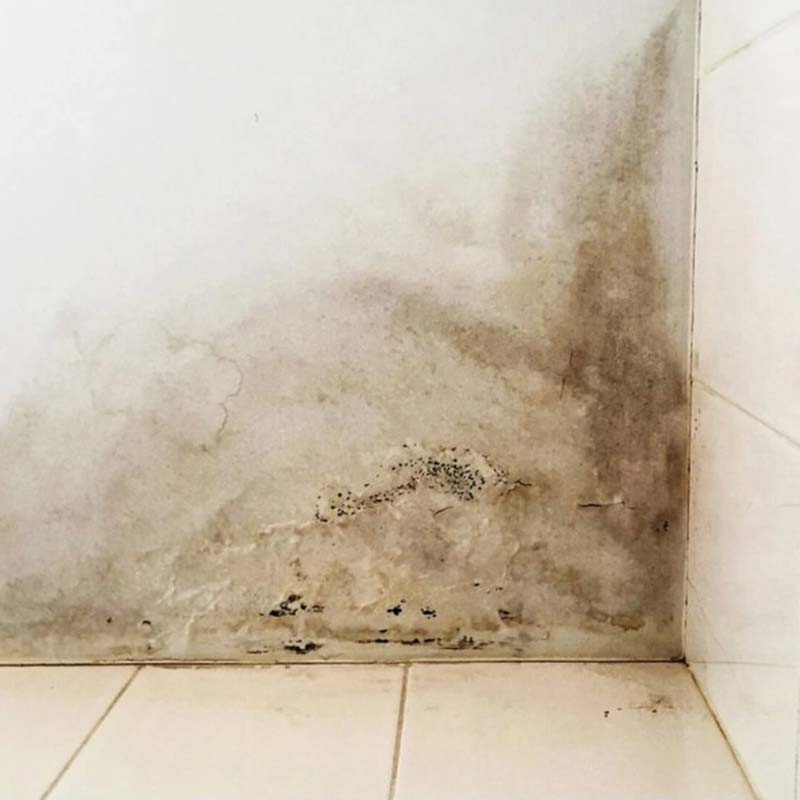
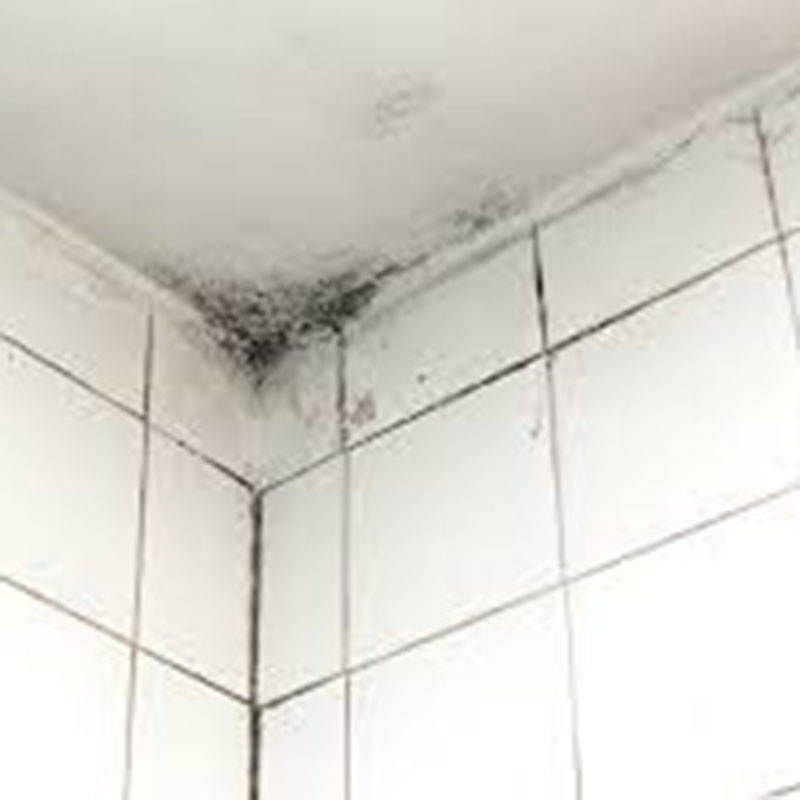
Dealing with mold in the bathroom
If your bathroom doesn’t get adequate ventilation mold and mildew will grow on the walls or ceiling (more on this shortly). There are many cleaning products available to combat this and many different opinions. Our go-to method for non hard surfaces is a mixture of around 25-40% bleach and water mixture. If that smells too strong for you, or you’re concerned about causing bleach stains on surfaces, you can try alternatives.
A more natural solution is White Vinegar used in a spray bottle without diluting it. The problem with diluting any product is that water can give the mold an additional source of growth. If you find that the bathroom smells like a pickle factory afterwards, add the juice from one fresh lemon. This citrus should also help to kill the mold and give off a pleasant smell.
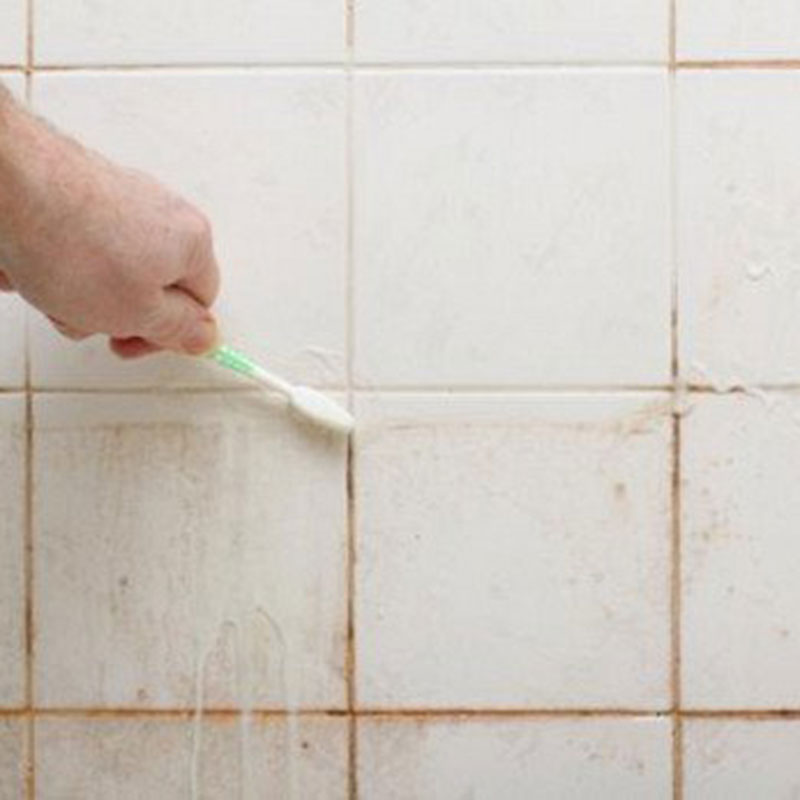
For stubborn areas, a cloth or scrub brush can be used to wipe away the mold spores. Use caution however to not wipe too hard on painted surfaces (especially with bleach) as this may cause some of the paint to come off. On tile, you can go to town with a nylon scouring pad or toothbrush in the grout lines. It probably goes without saying, but open a window if you can, and wear a mask while doing this. Also we shouldn’t need to say it but, NEVER MIX BLEACH WITH AMMONIA.
Why does my bathroom get mold in it?
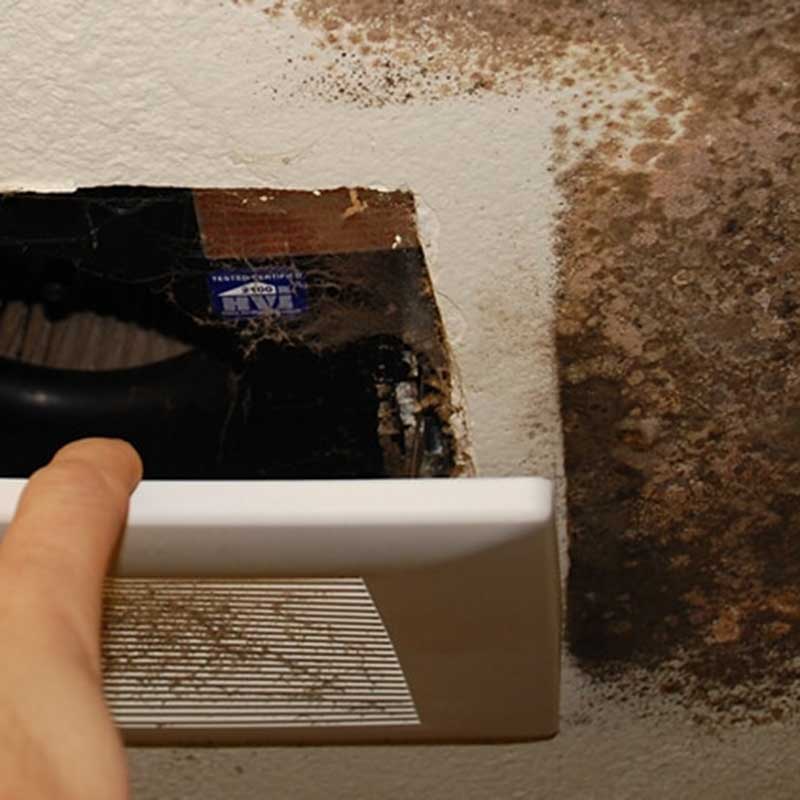
Quiet often a build up of mold and mildew can be attributed to inadequate ventilation. Just because you hear the fan turn on, doesn’t mean it’s actually doing much good. It’s possible that the bathroom fan needs to be replaced with a more powerful unit that moves more air. This is called the CFM rating and it’s generally recommended that the unit can move 1 CFM per square foot of the room. That said, other factors such as age and obstructions may cause the unit to perform below its rating.
Another issue can be fans that don’t actually vent to the exterior of the house. We’re not sure why, but some people think it’s ok to just route exhaust fans to an attic or crawlspace rather than outside. This can create moisture problems in the bathroom and the attic / crawlspace.
Sometimes the problem is on the other end and the louvers on the exterior port aren’t opening properly. This is easy to check: Turn on your bathroom fan and go outside to see if there’s air coming out of a vent port.
A simple way to test the air flow from inside is to turn the fan on and place a piece of toilet tissue against it. If it’s working well it should hold the TP in place. That said, the fan may still be underpowered for the size of your bathroom or located in the wrong place.
Mold In Other Areas Of The House:
Mildew can also build up in other areas of the home such as the basement. On a warm day we suggest you open all the doors and windows to the basement. Sunlight is one of the best remedies for mildew. Vacuum any carpets and mop concrete floors with some basic soap and a touch of bleach added. Change any linens, flip mattresses over, and let your nose be your guide to what areas need to be cleaned.
Moss and mold can build up on the sides of the house and walkways. We will address these areas a little later in this article.
Swipe to Scroll -->
#6 Reseal The Deck & Exterior Wood
#6 Reseal The Deck & Exterior Wood
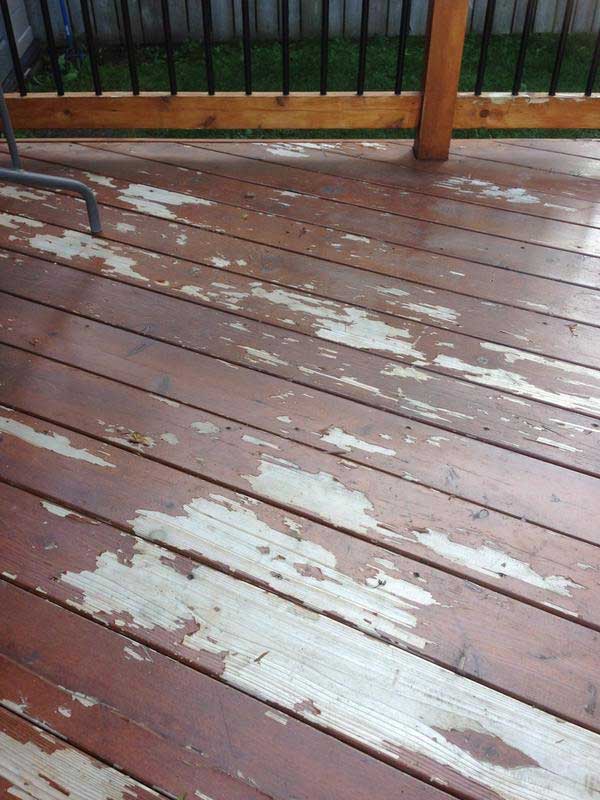
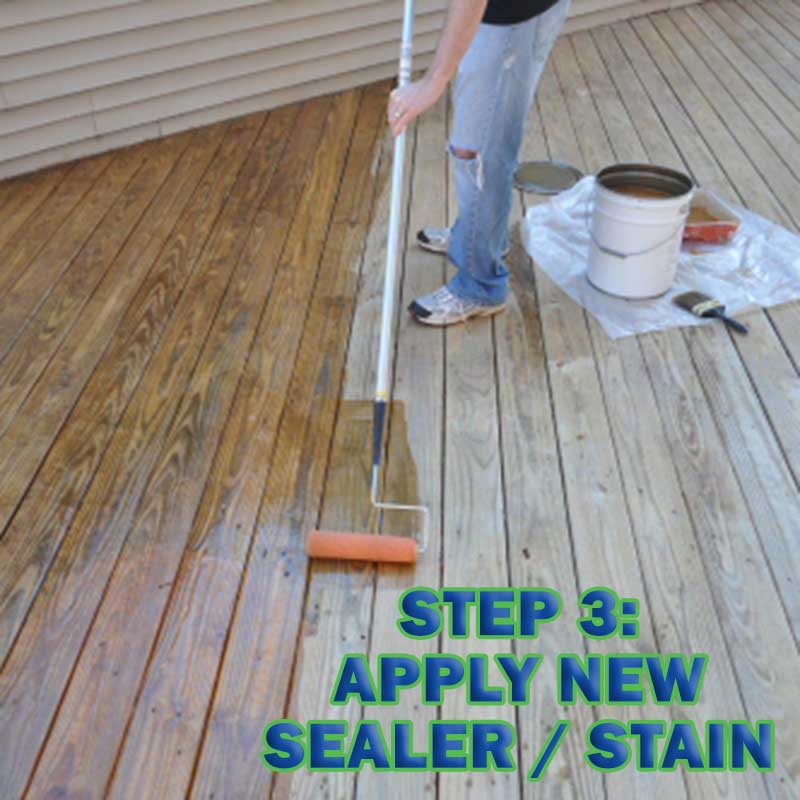
Depending on the type of sealant you use, it’s exposure to weather and sunlight, and how it’s used a typical deck needs a coat of sealer every 1-3 years. We recommend every other year on average. This means if you didn’t do it last summer, it’s probably good to apply a coat of deck sealant this year.
Like most home maintenance tasks it’s easy to think “Oh it looks fine, I’ll skip it another year”. Truth is that it’s not going to fall apart right away. The problem is that eventually water will penetrate the wood and then the rot will set in. Once you seal it later, you’ll just be trapping the water inside the wood. The same idea applies to unpainted wooden fences and handrails around your home.
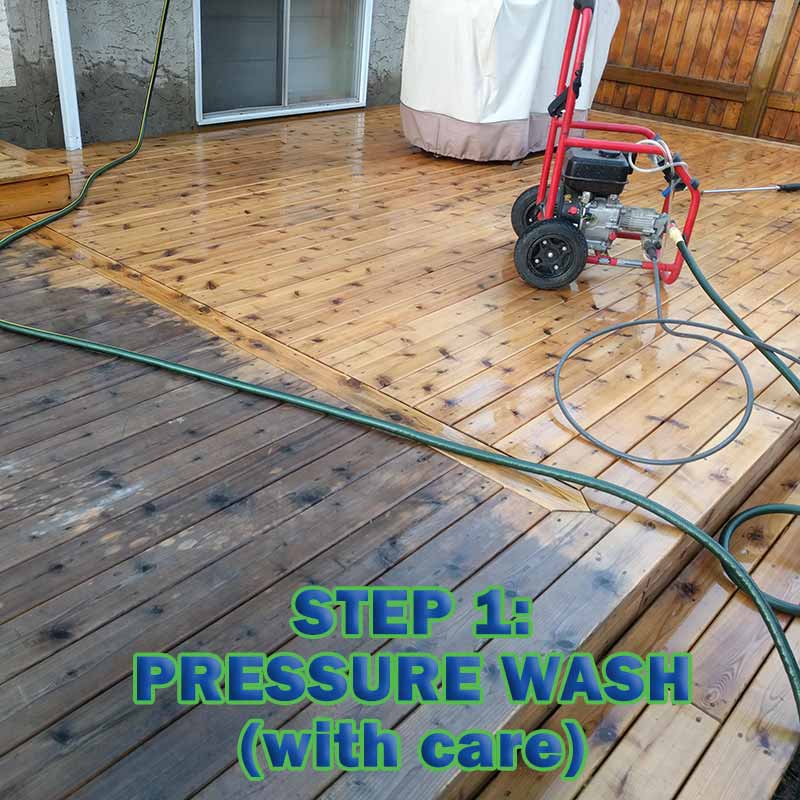
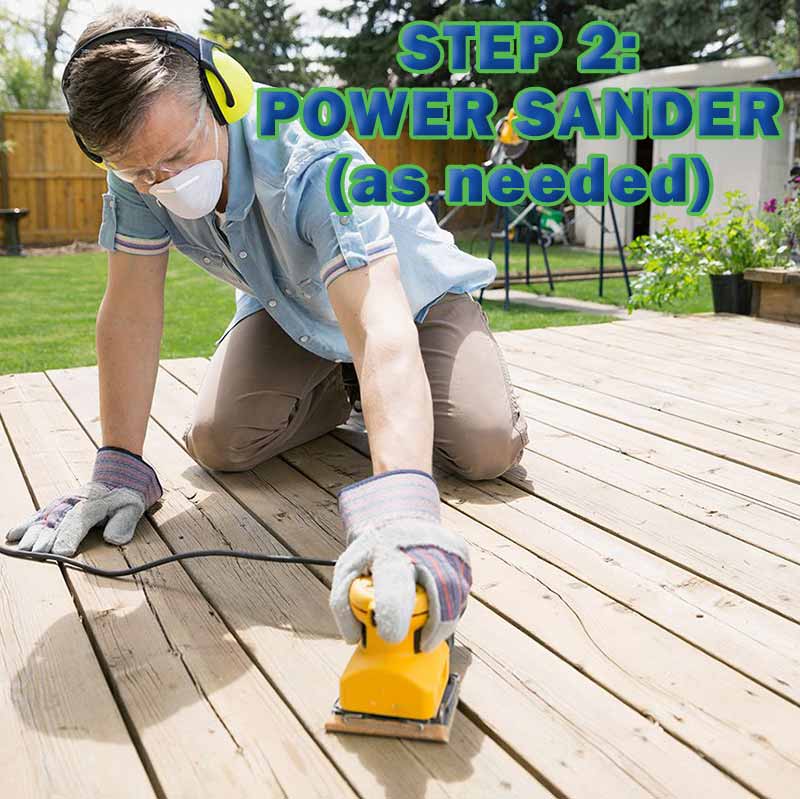
The process for how to do this yourself is probably worthy of its own How-To Guide so we won’t get into it here with much detail. However we have shown the basic steps in the following 3 photos.
Swipe to Scroll -->
#7 Landscaping
#7 Landscaping
There can be a long list of items to do when getting your yard ready for spring & summer. Then again not everyone has the type of yard that requires much effort. For larger jobs we recommend hiring a Professional Landscaper. If you’re keen to do some of it yourself, here are some of the common items that we suggest.
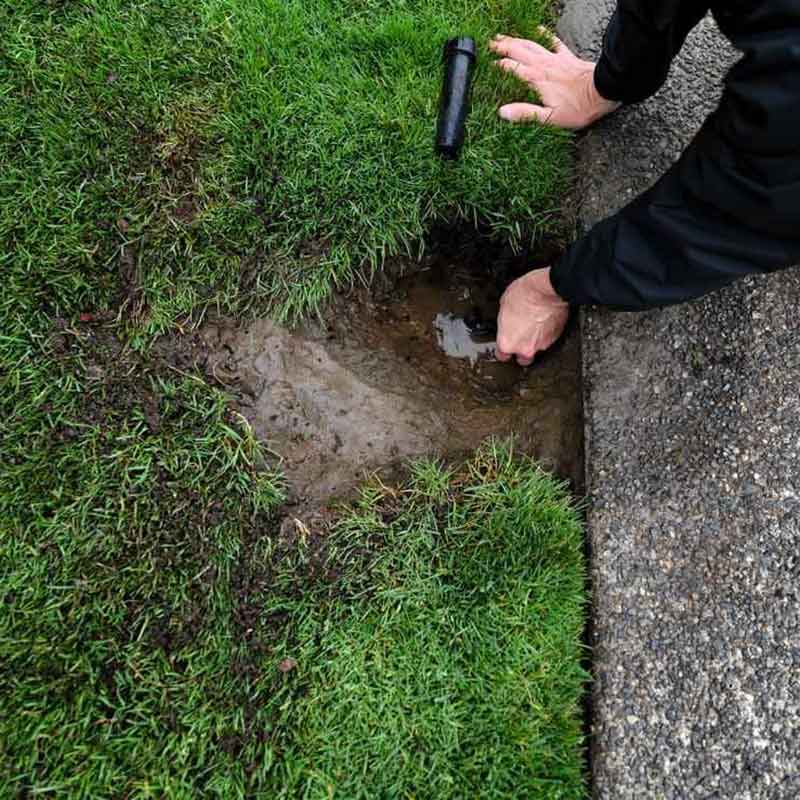
- Inspect your sprinkler system. Check that sprinkler heads are not damaged and no lines were broken from cold temperatures.
- Remove dead leaves, twigs, debris from the yard
- Cut back perennials and ornamental grasses
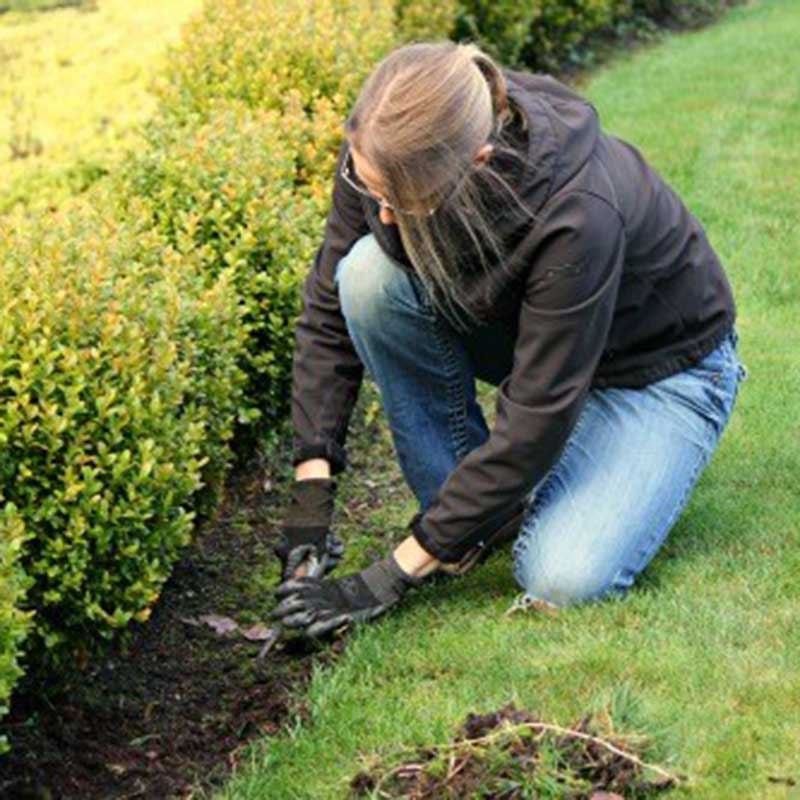
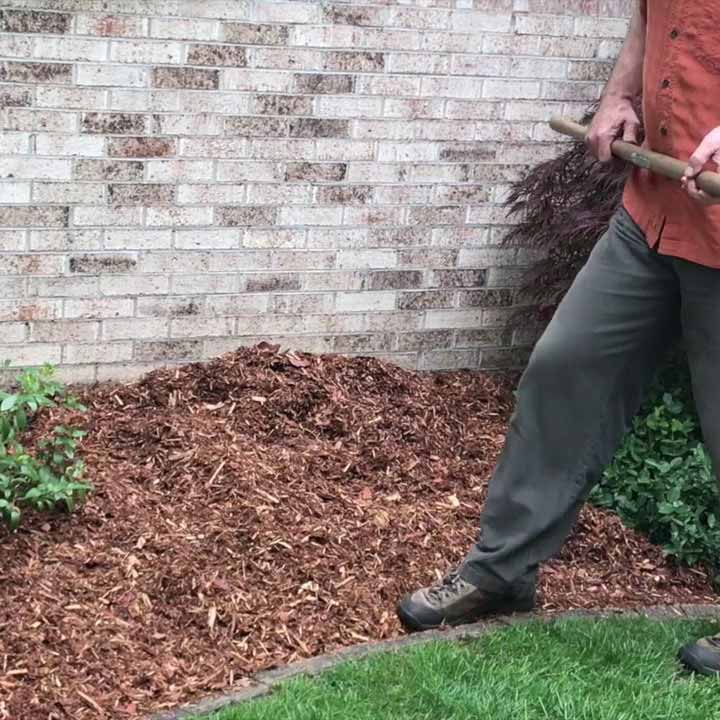
- Remove weeds by hand and use composted mulch to inhibit their growth
- Apply organic fertilizer to flower beds
- Spread a good organic mulch once your planter beds have been cleaned up and edged
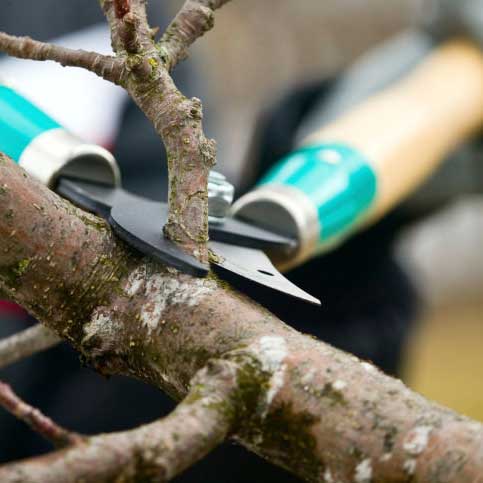
- Prune trees and trim the shrubs
- Mow early, mow often (start after it’s at least 2 inches high, then cut no more than 1/3 of it’s height)
Swipe to Scroll -->
#8 Service The Lawn Mower
#8 Service The Lawn Mower
As part of your seasonal landscaping preparations, you probably need to do a few things for your lawn mower so it’s ready for the season. These include:
- Drain and replace the gas if you didn’t add a fuel stabilizer in the fall
- Check the oil levels
- Take the air filter out and inspect it. If it’s just a little dirty you can clean it with your shop vac.
- Change the spark plug if it’s running rough
- Lubricate the moving parts
- Sharpen the blade using a file while wearing some heavy gloves.

#9 Replace HVAC Air Filter
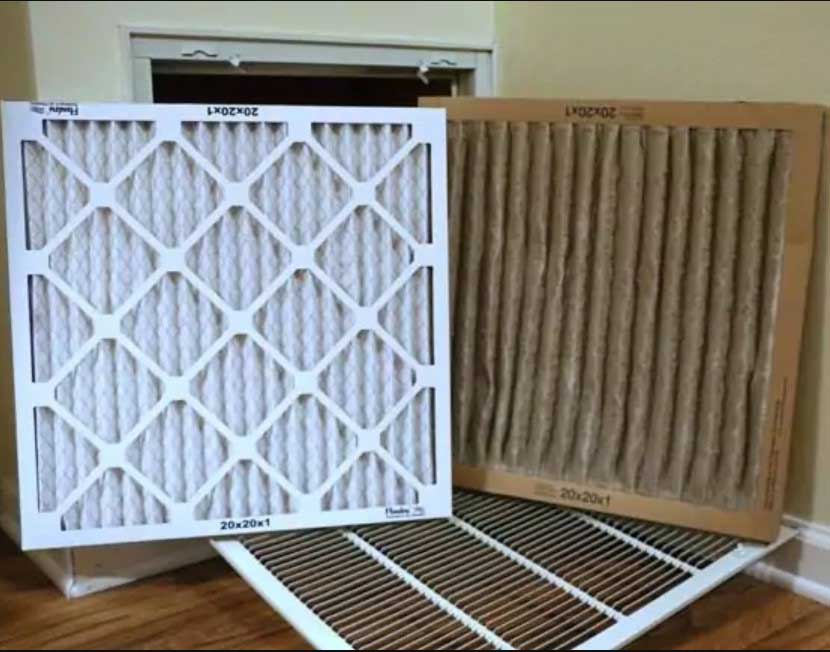
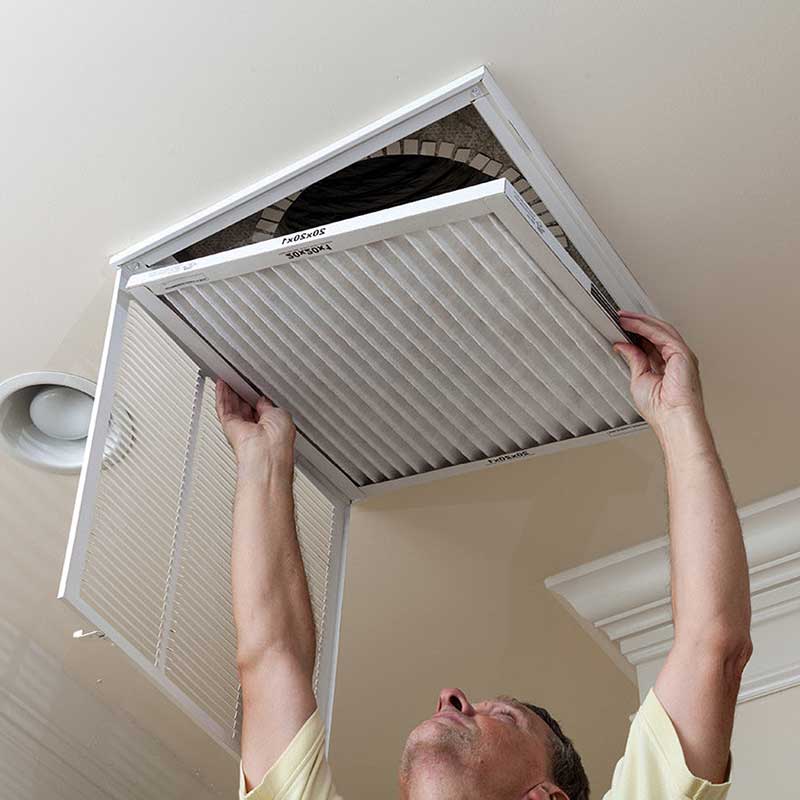
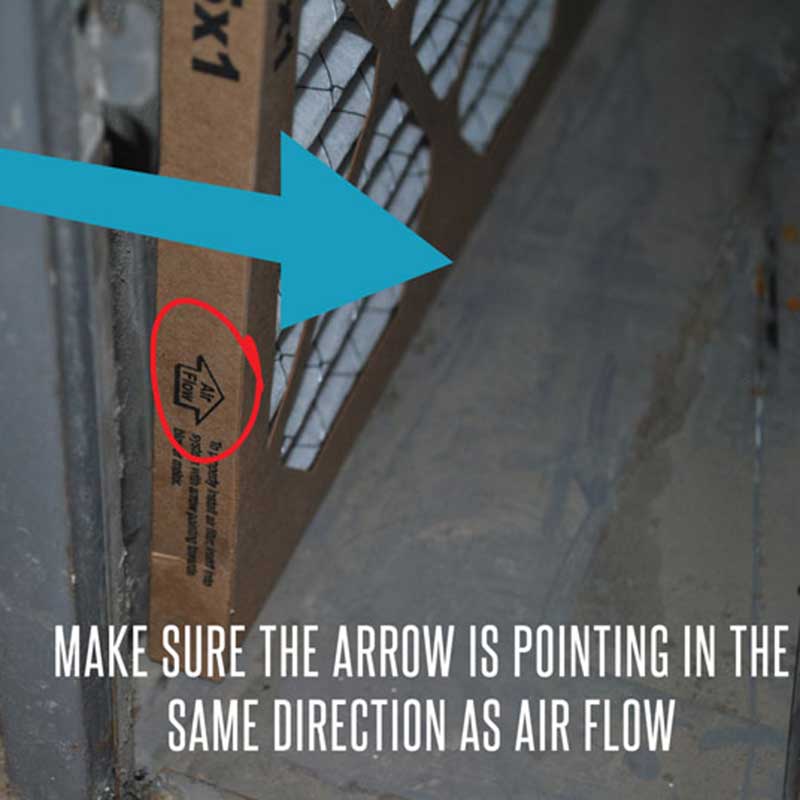
#9 Replace HVAC Air Filter
If you have a central heating and cooling system, your air quality is something to pay close attention to. Some people don’t realize that their house may have more than one air filter. In any case, it’s recommended to replace the air filter up to 3-4 times a year. Most homeowners will actually do it 1-2 times a year depending on how much they use it. If you have pets or allergies though, it should be done more often. Since Spring and Summer is a high time for pollen in the air, this makes it an ideal time to change the filter(s).
What else can I do to improve the air quality in my house?
You can clean the returns and vents if you haven’t done it in a while or recently did some remodeling. We think this is something that can be done at least once a year by homeowners. You won’t be able to clean out the duct system, but you can at least remove the register covers and clean out the space just inside the wall or floor with your vacuum.
If you have recently done some significant remodeling or have allergy issues, then you can hire a HVAC cleaning service to do a more thorough cleaning. This doesn’t have to be a yearly thing for most houses, but it is something to consider.
Swipe to Scroll -->
#10 Prepare Central AC Units
#10 Prepare Central AC Units
Seattle isn’t known for its heatwaves. That said, there are parts of the summer when you may want to relax in some cooler air. Old fashion window units are less common these days as more homeowners use central air or split AC units.
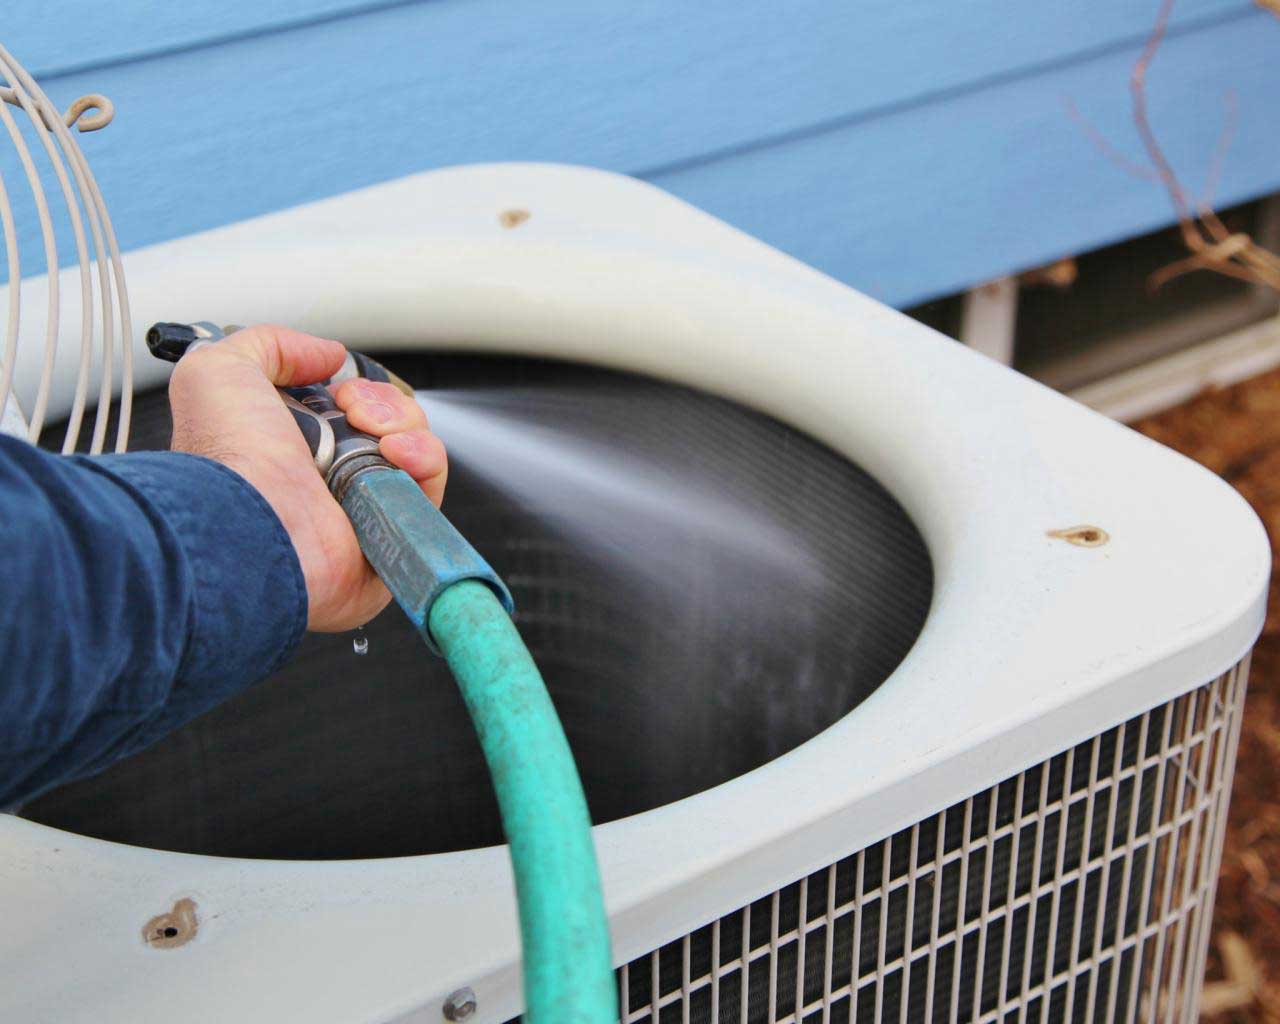
Typically if the unit is in good condition there are only a few things you need to do when preparing the AC unit for summer.
- Clean or Replace the AC filters (you might be surprised at how dirty they get)
- Clean the condenser coils
- Clear debris away from the condenser unit
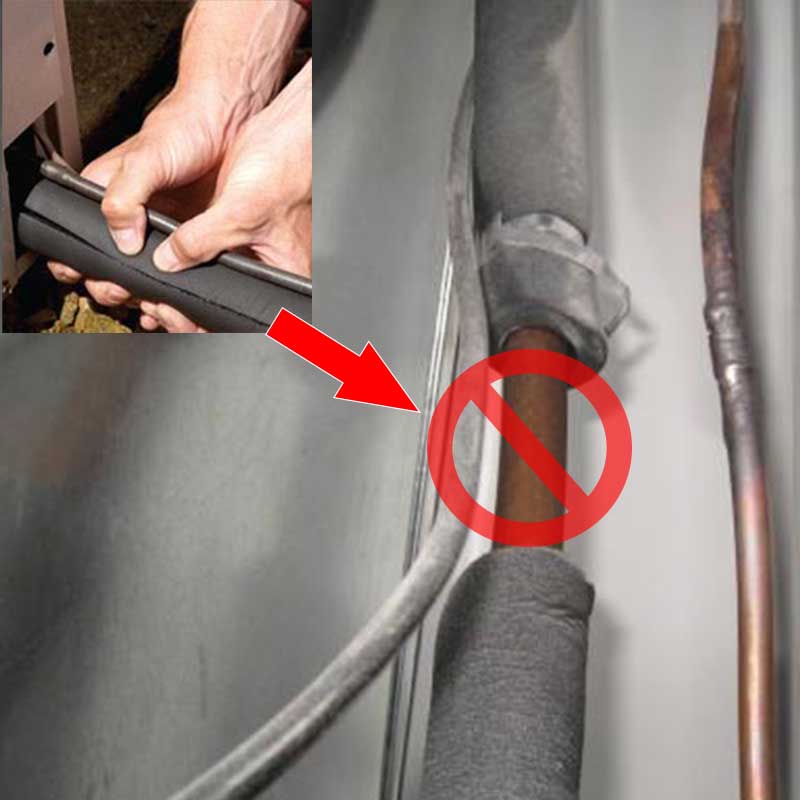
- Check the coolant lines for breaks or missing insulation
If you want more information about doing this, contact your AC units authorized service provider. You can also learn more about doing this yourself with specific online tutorials.
#11 Wash And/Or Paint the Exterior
#11 Wash And/Or Paint the Exterior
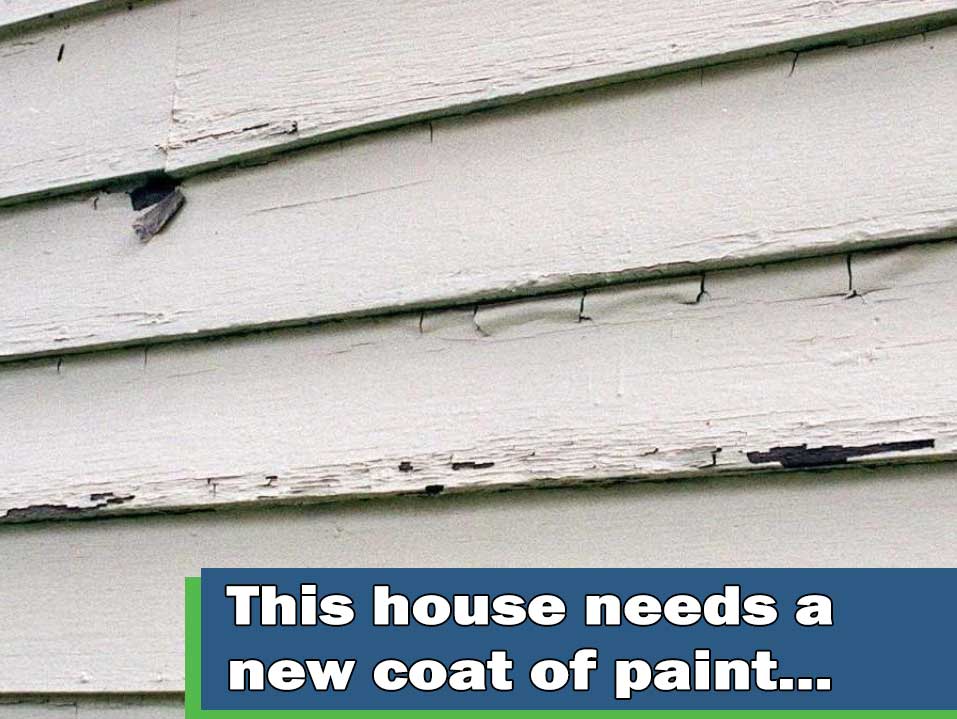
There’s no two ways about it, houses get dirty over the winter. Add to that years of exposure to the elements and eventually your home will need a new paint job. Typically a house should be painted every 5-10 years (7 years on average).
How can I tell if my house needs a new paint job or just a cleaning?
Walk around the house and look for cracks in the paint and calking. If there are chips of paint coming off or dark stains in some areas it is a pretty good sign that you want to paint it this year. Letting it go another year means that water might start to get in and cause damage that will cost you more money. If you have the time, tools, and patience you can probably paint it yourself. On the other hand you can call a pro like Talon Enterprise and get a quote to have the house professionally painted.
What if my house only needs to be cleaned?
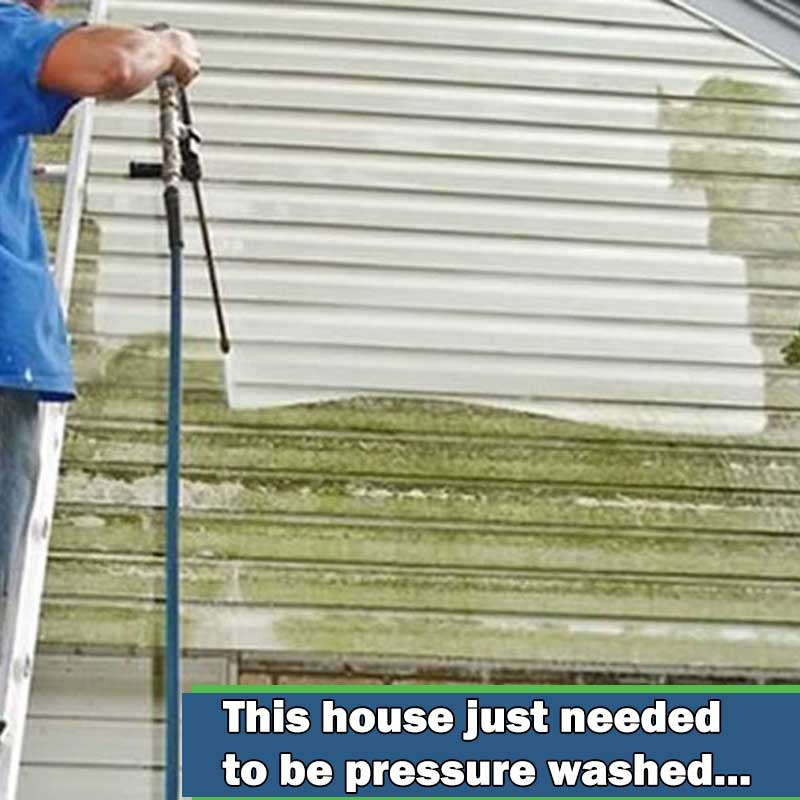
If it’s only been a couple of years since the house was painted, but some areas have that familiar “emerald city green” starting to show up, you might just need to wash it. This can be done in a few ways either by scrubbing small areas like you would washing the car, or using a pressure washer. Most of us like the sound of using a pressure washer because it means less effort on our part. As effortless as it sounds, you need to be careful that you don’t do more harm than good. We covered this in more detail in our Guide to Pre-Sale Home Improvements as well.
#12 Check The Foundation For Cracks
#12 Check The Foundation For Cracks
“It’s not the beauty of a building you should look at. It’s the construction of the foundation that will stand the test of time”
~David Allen Coe
We get it, this kind of task is boring. Most of you will skip this step. So why even mention it?
Well if your house develops foundation problems, you will be paying a lot of money to get the house jacked up and straightened out. While this is also a service that we provide, we would much rather remodel parts of your house to improve your life and bring you happiness.

How can I inspect my house for foundation problems?
Here’s what to look for:
- Doors and Windows that don’t close properly (or have uneven gaps around the edges)
- Floors or ceilings that might be starting to sag
- Walls that have a bow in them (put your eye against the surface and look down it)
- Mold or musty smells in the basement that don’t go away after cleaning
- Cracks in the drywall (especially around Doors & Windows) or nails that are popping out
- Visible cracks in the foundation walls.
Minor cracks are something that you can address yourself with specialty products from the hardware store. However, if it’s large enough to stick a penny in, call a foundation specialist to get their expert opinion. Water expands when it freezes. So even though we might only get a few days a year when the temperature drops below freezing, it can make small cracks grow over time. Add to that all the pressure sitting on your foundation, and you can see why it makes sense to get ahead of even small cracks before they can grow.


Swipe to Scroll -->
#13 Pressure Wash Walkways & Parking Areas
#13 Pressure Wash Walkways & Parking Areas
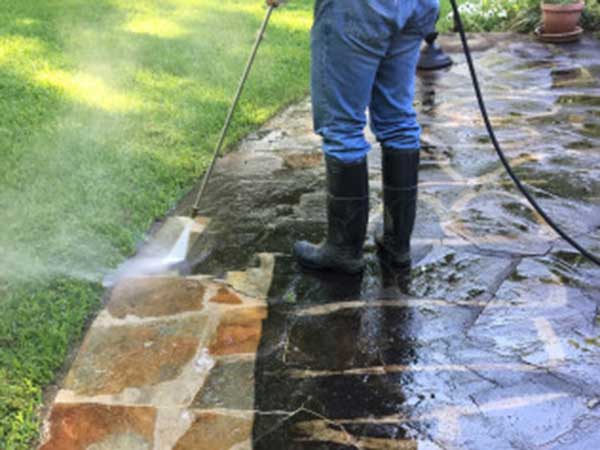
This is a yearly battle for most of us living in Seattle. As water sits on pavement and doesn’t get enough sunlight, it starts to grow green and slippery. Dealing with it regularly is as much of a safety issue as it is beneficial in appearance.
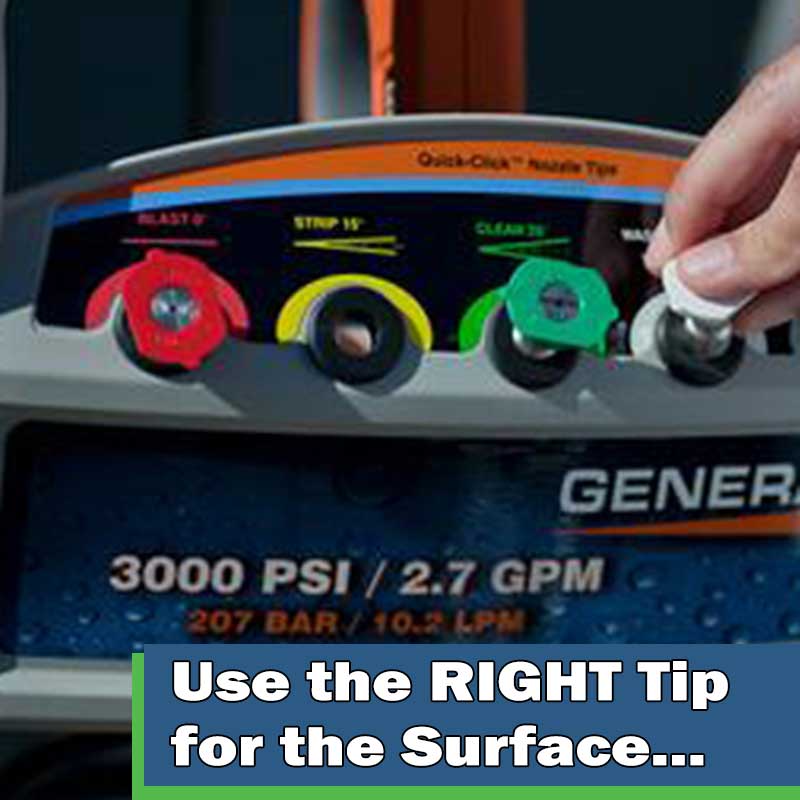
Using a pressure washer on paved surfaces is usually straightforward. Most units come with a few nozzles that range in width from 25-40 degrees. You will pick the tip that suits your situation based on how wide of an area you are doing and how caked on the moss is. We suggest you start at the edge that people will see the least and work your way in a systematic fashion to the other end.
There are a few things to be careful to avoid when using a pressure washer.
- Protect your eyes from flying debris & Wear boots to protect your feet
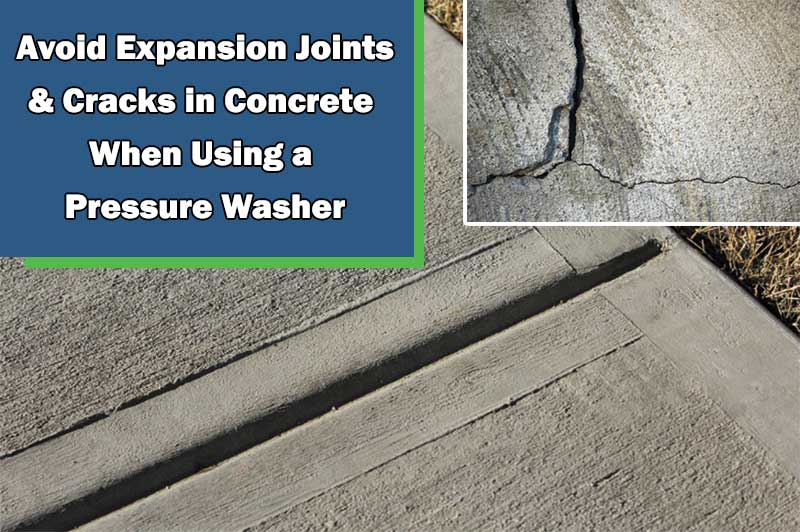
- Don’t shoot the jet of water directly into cracks as it will make them larger
- Avoid any expansion joints between sections of concrete. These may have soft material that you will damage.
- Be extra careful with wood and other surfaces that can be damaged
- Select the right sprayer tip. When in doubt start with less pressure (wider angle)
- Don’t “draw” any patterns or make sharp lines with the jet of water. You may never get them to go away.
- Pick your exit strategy. If you don’t plan to do all of the adjoining space, decide early where you will stop.
- Plan ahead. It’s a lot like painting in that once you do one area, the next one looks mismatched.
#14 Screen Time
#14 Screen Time
Who doesn’t love a nice breeze through the house on a perfect Seattle day?
This is the time of year when we remember that the cat scratched a hole in the screen last summer because it saw a bug land on the other side. Now there’s a hole to let pests in.
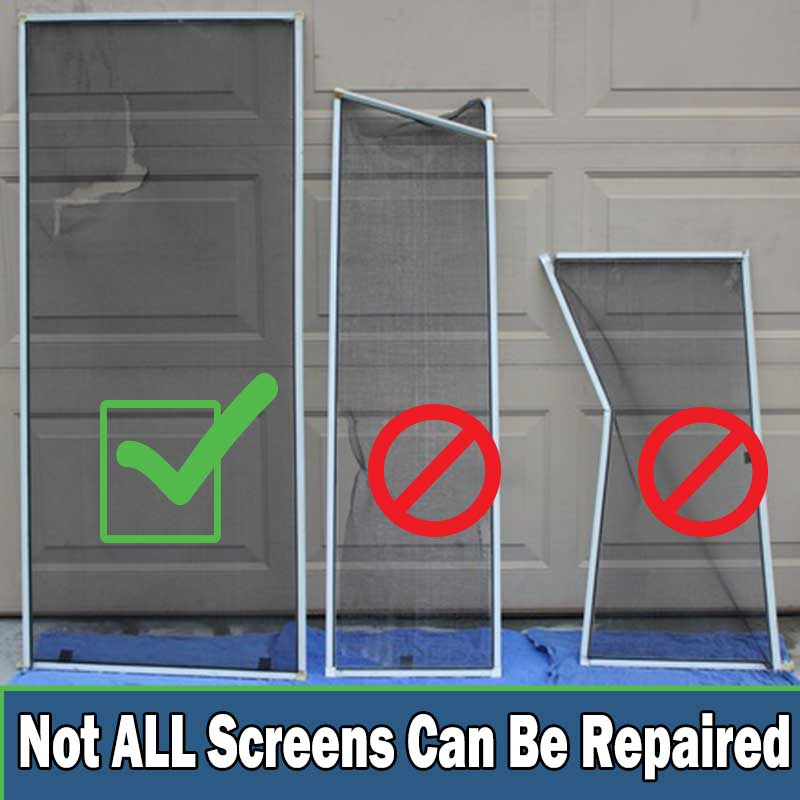
So, do you throw the screen away and replace it, get the frame re-screened, or patch it?
How do I fix holes in my window and door screens?
Honestly it depends on your screen and your personal standards?
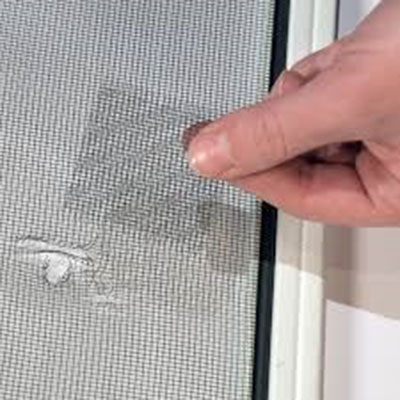
If it’s a few small holes, a screen patch kit might be the quick and easy solution for you.
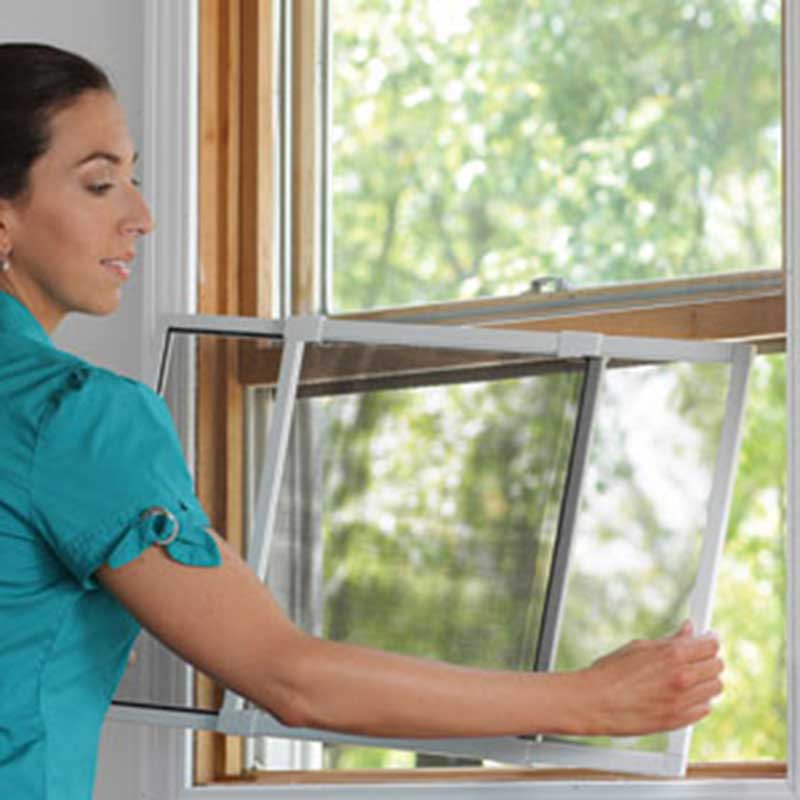
If the darn cat really did a number on it and it’s got big holes in the middle, it’s possible to replace the whole screen panel. For this you will need a roll of screen material, razor knife, some clothes pins, gasket, gasket tool, and a little time.
If the frame is all messed up, you can buy a replacement. This can get tricky because there are so many windows that a “standard size” screen doesn’t really exist. Try contacting a local supplier that carries your brand of window. Getting a custom made screen to fit exactly is also an option, but not the cheapest one. If you’re on a budget, try an expandable screen that will fit many window sizes.

Swipe to Scroll -->
#15 Prevention & Extras
#15 Prevention & Extras
An ounce of prevention.
We almost hesitate to mention these because they seem so cliche, but just to cover the bases here are a few extras.
Battery Power…
Most people say you should check your replace your smoke detector batteries every fall. Then again most people don’t do that, so if you didn’t do it in the fall, do it now. Also if you have a carbon monoxide detector don’t forget to replace that battery too. Most people forget about it.
Sump pumps: They aren’t as common in homes as they used to be. However if you have one, check that it’s working and free of debris. If it has a battery or generator back up, check those systems too.
Essential Supplies?
Are you all set for flash lights, bottled water, and ‘shelter in place’ supplies?
If there’s one thing that 2020 taught us, it’s just how important it is to be prepared BEFORE something happens that causes everyone to go panic buy all the supplies at Costco. If you don’t have a 1-2 weeks supply of the essentials, get yourself stocked up now while things are calm. Many of the items you buy can be used and replaced regularly so they’re not expired should you ever need to use them.
Back it up!
Ok so this one might sound silly in the context of a seasonal maintenance checklist. When was the last time you backed up all your photos and files onto a portable hard drive? Since we live in a very digital world, this can be part of your seasonal checklist. We even recommend keeping the hard drive in a waterproof Pelican case in an attempt to plan for that 100 year storm (which seems to come every 5 years now)


Swipe to Scroll -->
In Conclusion
In Conclusion
Not all of these items are going to be something you need to do every year. At the same time, some of these can be done in the spring and then reversed in the fall. We also acknowledge that by no means have we listed every possible thing like all the types of spring cleaning tasks. That type of list is better left to Better Homes & Gardens.
The general idea is this: Take care of your house and it will take care of you. As we stated earlier, we can and will do any of these things for you. You can always do some of the items on this Spring / Summer Maintenance checklist and then call Talon to take care of the rest!

If you find problems while inspecting your home that need to be addressed, we can give you a quote to fix those issues. Our reason for writing this article is so that you, the homeowner, understand there’s a lot of seasonal maintenance that you can do yourself. That way when you do call us, it’s to build you that new deck, or give you the kitchen remodel of your dreams!
Think we left something out?
Have a question for us?
Drop a comment below and we will address it. You’re always welcome to send us a message as well.
Know someone else that could benefit from this checklist or helpful tips? Use those share buttons and let them know!
Thanks for reading!
check out some of our other articles


Great article guys. I love how much details you go into.
My bathroom suffers from mold around the shower and I clean it constantly. I never thought about my fan though. It’s been there since I bought the house and I just assumed that it was working fine. Like you say, I can hear it running so it must be working. I’m going to look into getting it replace with a new unit. Hopefully with a higher CFM rating!
Anyway, thanks for the helpful advice!
Mike in West Seattle